
Blog
Change Images on Mouse Move with jQuery

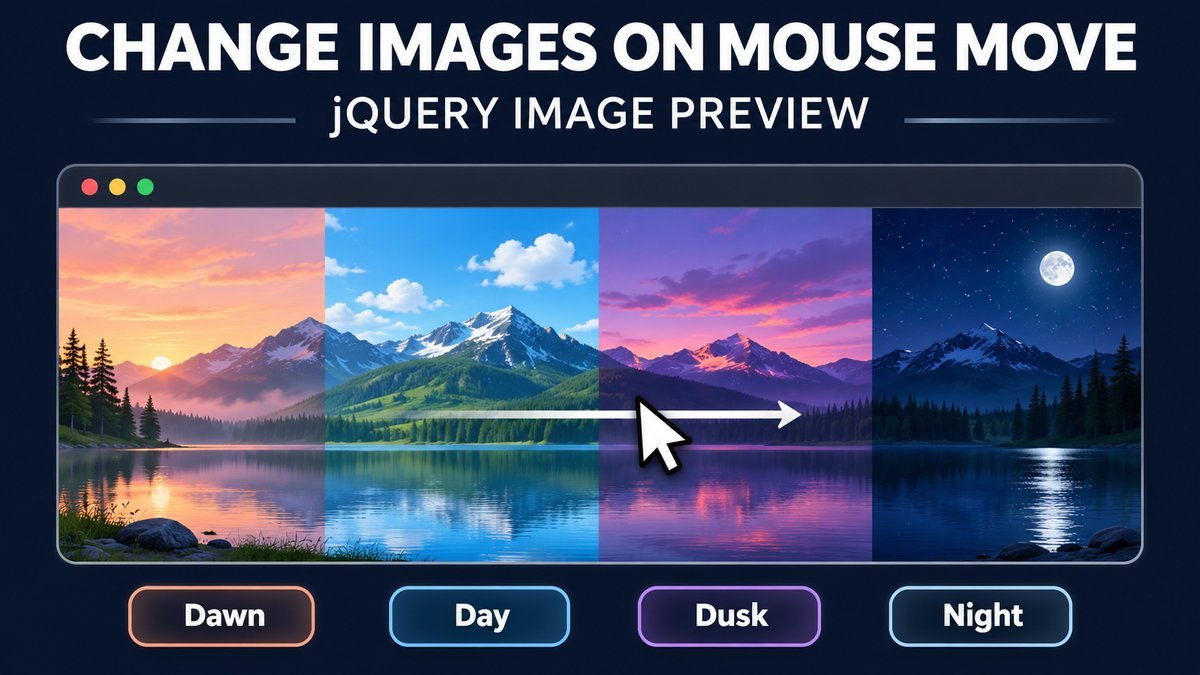
To change images on mouse move with jQuery, measure the pointer’s horizontal position inside the preview, divide it into equal zones and show the image assigned to that zone. This example maps four zones to Dawn, Day, Dusk and Night, with buttons for keyboard and touch users.
The preview changes instantly without autoplay or a shuffle plugin. It keeps the last selected scene when the pointer leaves, and a checkbox lets visitors pause mouse switching. The downloadable source includes original SVG artwork and local jQuery, so it works offline.
Try the mouse-move image preview
Mountain camp image preview
Move a mouse from left to right across the image to explore four times of day. On touch screens, use the buttons below.


Frame 1 of 4 — Dawn
Choosing a scene button pauses mouse switching. Check the option again to resume. Leaving the image keeps the last scene. With reduced motion enabled, mouse switching starts off.
JavaScript enables the controls. Without it, the Dawn scene remains visible.
How does the image change on mouse movement?
The image area is divided into four equal horizontal regions. The left quarter selects Dawn, the second selects Day, the third selects Dusk and the right quarter selects Night. This makes the result follow position rather than the number of mouse events. Moving back to an earlier region restores that region’s image.
The implementation binds a native pointermove event through jQuery. It reads the original pointer event so it can distinguish a mouse from touch or pen input. The MDN pointerType reference describes these input categories. This demo reacts only to mouse movement; buttons provide the same choices for other inputs.
1. Prepare the images and HTML
Use images with the same aspect ratio so switching does not change the preview’s height. Give each image meaningful alternative text. Render the first one normally and add the hidden attribute to the rest. Use native buttons for the alternative controls.
<div class="preview-stage">
  <img src="images/dawn.svg" alt="Mountain campsite at dawn" width="800" height="450">
  <img src="images/day.svg" alt="Mountain campsite by day" width="800" height="450" hidden>
  <img src="images/dusk.svg" alt="Mountain campsite at dusk" width="800" height="450" hidden>
  <img src="images/night.svg" alt="Mountain campsite at night" width="800" height="450" hidden>
</div>
<button type="button" data-frame="0" aria-pressed="true">Show Dawn</button>
<!-- Add one button for each remaining image. -->
The full source starts controls disabled and enables them only after initialization. If JavaScript fails, the first landscape still provides useful content. A separate no-script.html file lets you inspect that fallback directly.
2. Convert pointer coordinates into an image index
Both clientX and the rectangle’s left edge use viewport coordinates. Subtracting them gives a local horizontal position. Divide by the current width to obtain a fraction, multiply by the number of images, then round down. Clamp the result so the exact right edge cannot produce an out-of-range index.
var box = stage.getBoundingClientRect();
if (box.width <= 0) return;
var fraction = Math.max(0, Math.min(1,
  (event.clientX - box.left) / box.width
));
var next = Math.min(images.length - 1,
  Math.floor(fraction * images.length)
);
For four images, fractions below 0.25 select index 0; 0.25 to below 0.5 selects index 1; 0.5 to below 0.75 selects index 2; and 0.75 through 1 selects index 3. The MDN getBoundingClientRect documentation explains that the returned position is relative to the viewport and includes the element’s border and padding. The demo’s stage has no padding or border, keeping the calculation straightforward.
Measure the rectangle when the event occurs instead of caching a fixed width. The preview can then respond to a resized layout. Avoid adding a rotating or skewing transform to the hit area without adapting the coordinate calculation.
3. Show one image and update the controls
The complete show function hides the previous image, reveals the new one, updates the caption and changes every button’s aria-pressed value. It skips the image visibility change when the selected index has not changed. That prevents repeated DOM visibility updates while the pointer remains in one zone.
function show(next) {
  if (next !== index) {
    images[index].hidden = true;
    images[next].hidden = false;
    index = next;
  }
  buttons.forEach(function (button, i) {
    button.setAttribute('aria-pressed', String(i === index));
  });
}
The visible caption follows the current frame. A separate status region announces button choices and pause changes. It does not announce every hover update, which would generate excessive speech while a mouse moves. No fade or slide transition is used.
4. Support touch, keyboard and reduced motion
Touch screens do not have a persistent hover position. The four scene buttons work by tapping or by using Tab followed by Enter or Space. Selecting a button also turns off mouse switching, so a resting pointer cannot immediately override an intentional selection. Visitors can enable it again with the checkbox.
When the browser reports a reduced-motion preference during initialization, mouse switching starts paused. The buttons continue to work, and the visitor can explicitly opt in to pointer switching. This example does not change that choice automatically if the operating-system preference changes while the page is already open.
The pointer handler ignores touch and pen input. It does not capture pointers, prevent touch scrolling or require a drag gesture. Leaving the preview preserves the last frame; there is no automatic reset or timer.
5. Keep the layout responsive
.preview-stage {
  width: 100%;
  aspect-ratio: 16 / 9;
  overflow: hidden;
}
.preview-stage img {
  display: block;
  width: 100%;
  height: 100%;
  object-fit: cover;
}
.preview-stage [hidden] { display: none !important; }
Allow the control row to wrap on narrow screens and keep buttons large enough to tap comfortably. Preserve a clear focus outline. If you replace the SVGs with photographs, choose appropriate dimensions and compression, and ensure the alternative text describes each view. This small demo loads all four assets; large galleries need an image-loading strategy that avoids excessive downloads.
Download and customize the source
The ZIP contains index.html, no-script.html, style.css, script.js, README.md, four original SVGs in images/ and two jQuery vendor files including its license. Extract the archive and open index.html. There is no build step.
The HTML uses embedded data URLs for the same SVG artwork included in images/. To use your own files, replace each image’s src and alt, update the scene button labels and edit the names array in script.js. Keep the image and button counts aligned. For WordPress, enqueue the component assets through a theme or plugin and reuse the site’s jQuery rather than loading a second copy.
Frequently asked questions
Is this a 360-degree product viewer?
No. It is a position-controlled sequence of separate images. You can use product angles as frames, but the effect does not create missing views or render a three-dimensional model.
Can I add more than four images?
Yes. Add an image, its scene button and its label in the names array. The calculation uses the image count, so each image receives an equal share of the horizontal preview area.
Why does the image remain unchanged on my phone?
The demo intentionally ignores touch movement. Tap one of the scene buttons to change it. This lets normal page scrolling continue without requiring a swipe interaction.
Does it need the old shuffle-images plugin?
No. The example uses a small jQuery event handler and native element measurements. It replaces the legacy plugin setup with an explicit position-to-frame calculation.
Why does mouse movement stop after I select a button?
Button selection pauses pointer switching to keep your choice stable. Check Enable mouse-position switching to resume it.
Can I build a slider with previous and next controls instead?
Yes. Use a manual slider when sequential browsing is more appropriate. See the CSS and jQuery moving slider tutorial for a related pattern. For a compact interactive form, try the responsive feedback popup tutorial.
Build a predictable image preview
Map pointer position to an explicit frame, preserve stable image dimensions and provide buttons for every choice. The result stays usable across mouse, keyboard and touch input while keeping the interaction small enough to understand and customize.