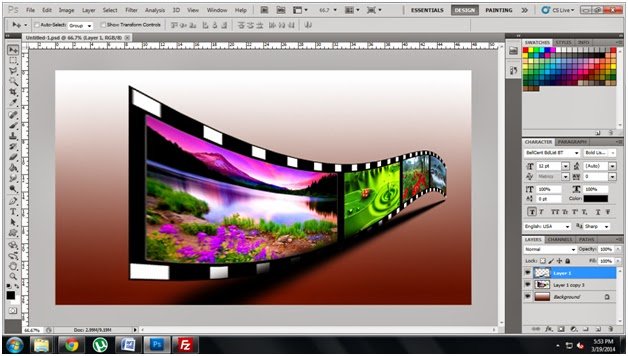

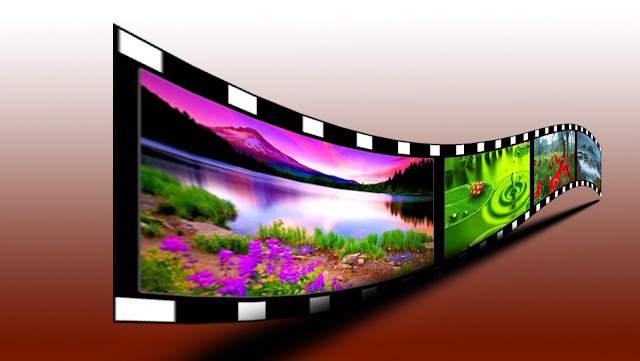
This is one of the nice effect done by using Photoshop. This type of 3d film roll effects will use various field in designing. It is looking very nice and easy to create. Here i provided step by step instruction with screenshot to better understanding. You can create this effect very easily to follow this below steps of instructions.

Start learn This Project:
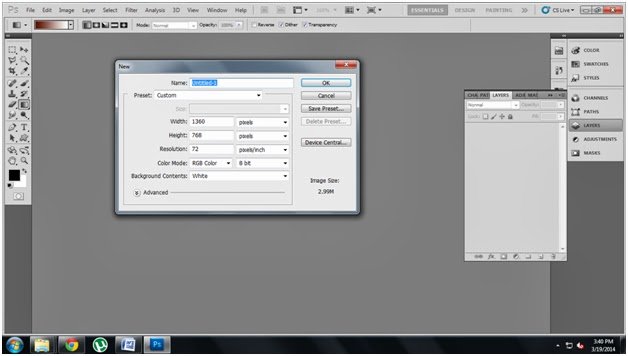
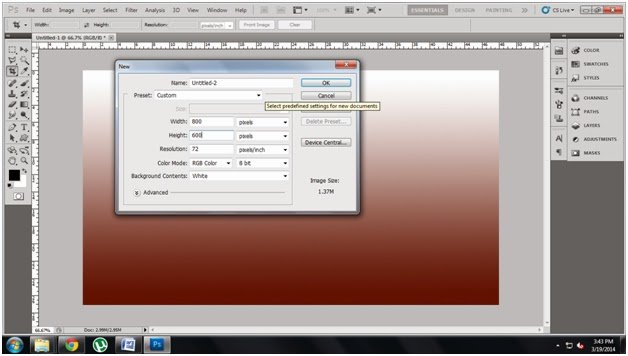
Step1: Create new and set width and height
Step2: Choose Gradient tool
and choose colour what you want like below diagram
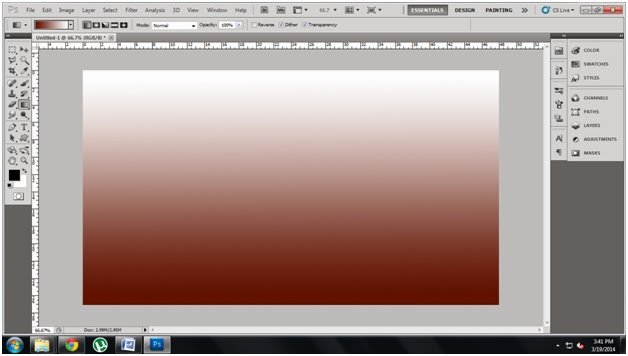
and choose colour what you want like below diagram
Step3: Create New file from Photoshop to create photo film
roll
roll
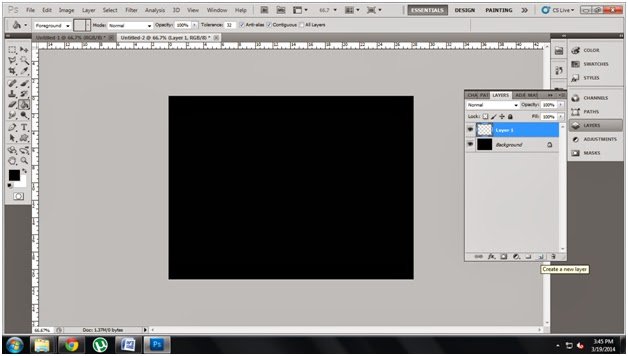
Step4: Make it background color as a black and create new
layer
layer
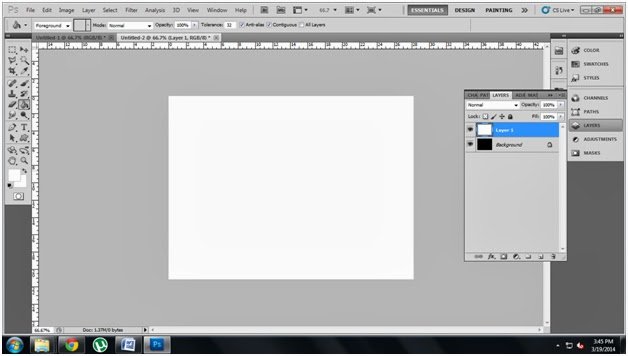
Step5: Choose white as a New layer color
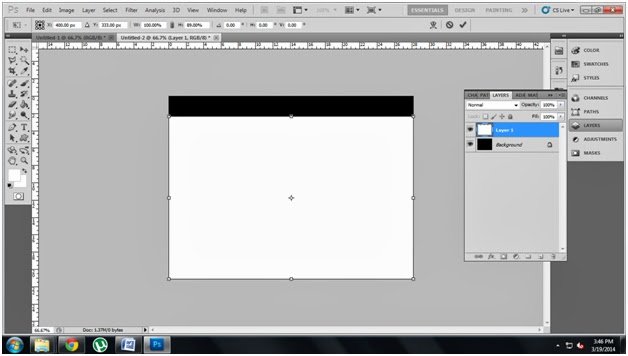
Step 6: Press Ctrl+T drag the layer like below
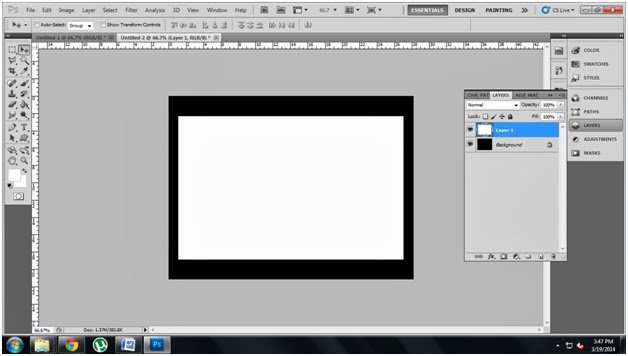
Step8: Make it as single layer (Select two layer and press
ctrl+E) like this
ctrl+E) like this
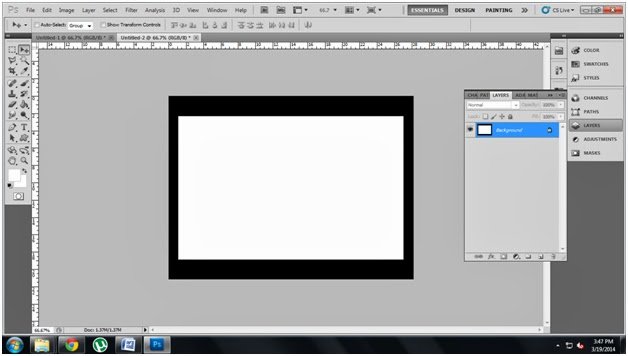
Step9: Press Ctrl+A and then go to edit press copy
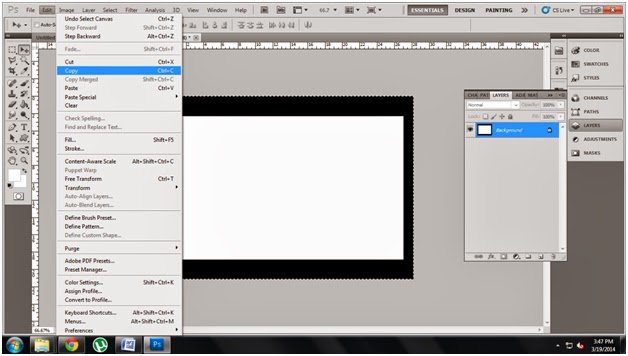
Step10: Go to edit and past it in first file
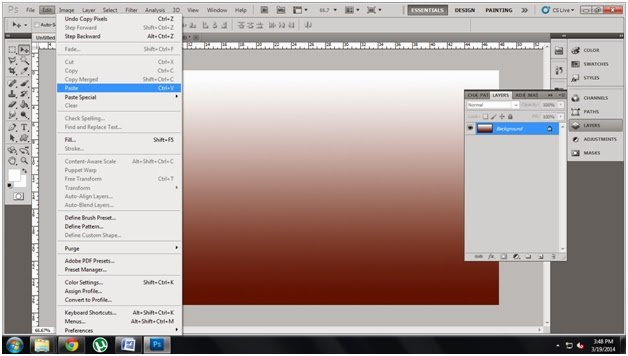
Step11: Now you get like this
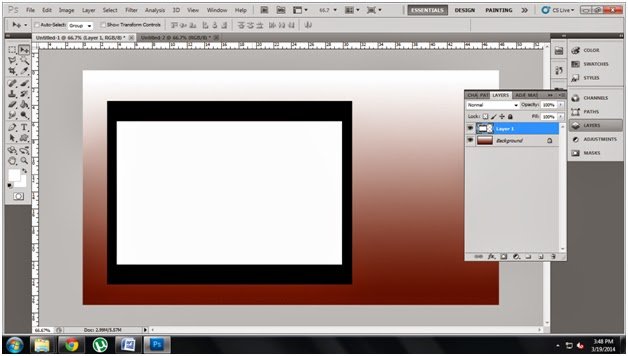
Step12: Press Ctrl +T and make the diagram as a small one like
below
below
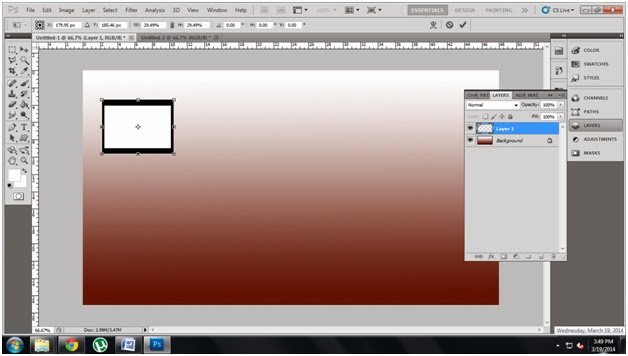
Step13: Press Ctrl+J 3 times you get 3 duplicate copy
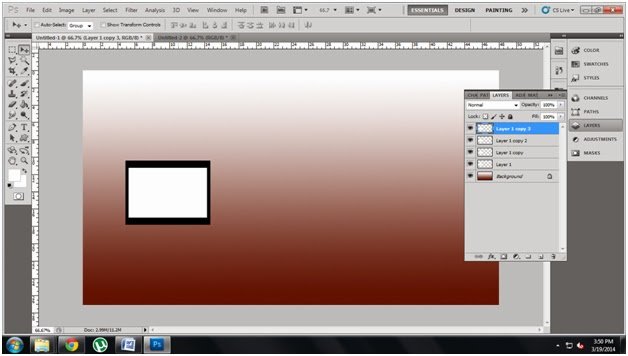
Step14: Arrange it like below diagram
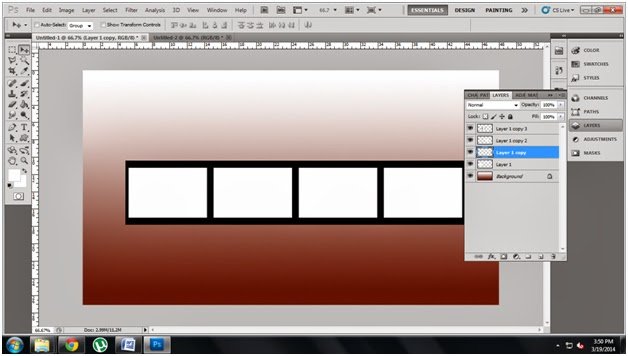
Step15: Make it as single layer (Select layer and press
Ctrl+E).
Ctrl+E).
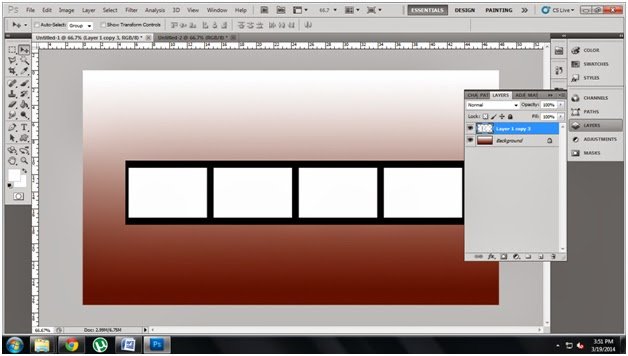
Step16: select Magic Wand tool from tool box and erase the
white color in that diagram and make is as a below diagram.
white color in that diagram and make is as a below diagram.
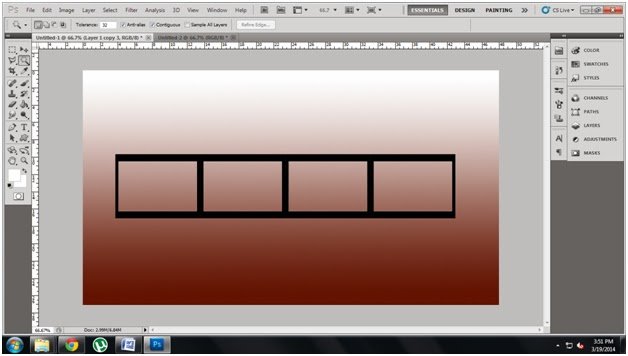
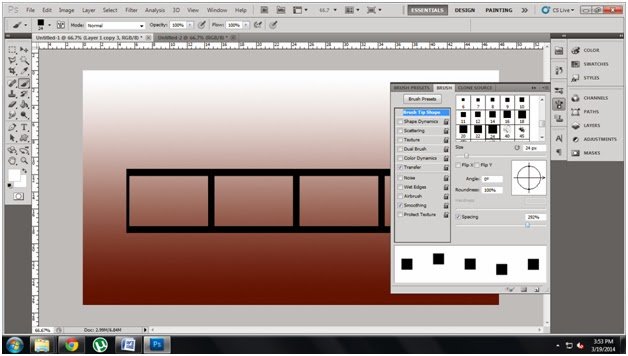
Step17: Choose brush tool and then go windows press brush
you get like below window 24px squrebox fix spacing as a 292 like below window.
you get like below window 24px squrebox fix spacing as a 292 like below window.
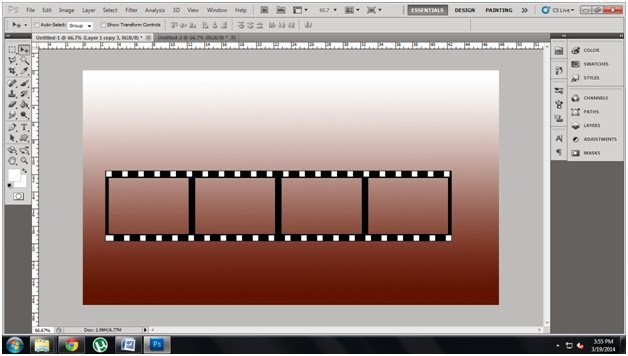
Step 18: using brush tool Press shift and click left corner
and then drag to right corner like that you create below also you can get like
below diagram.
and then drag to right corner like that you create below also you can get like
below diagram.
Step19: go to file open the 4 photos u want.
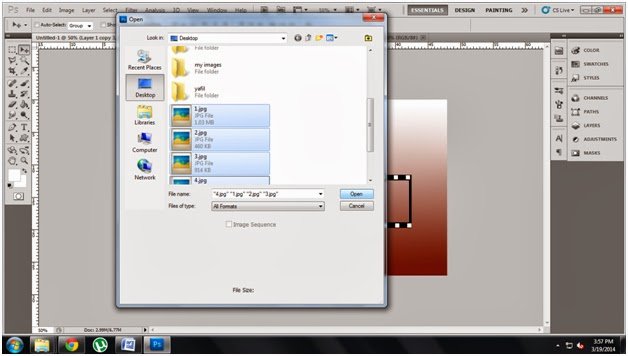
Step20: Fix the photos particular box like below one by one
using layer adjustment
using layer adjustment
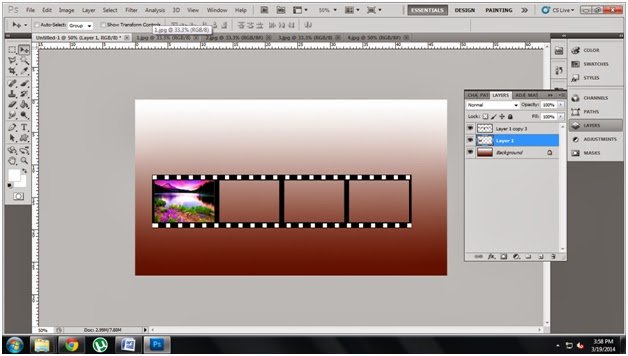
Step21: Fix the photos particular box like below one by one
using layer adjustment Make all layers as a
single layer except baground layer
using layer adjustment Make all layers as a
single layer except baground layer
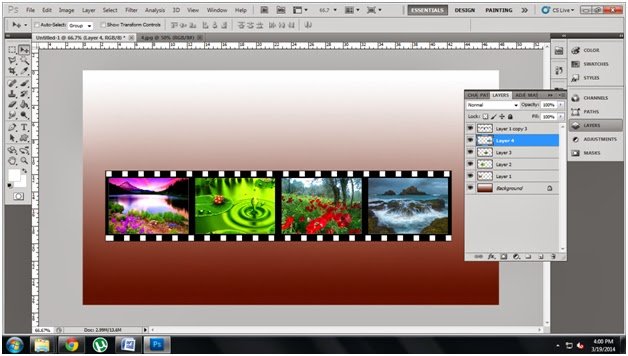
Step22: Go to edit select transform in that select wrap
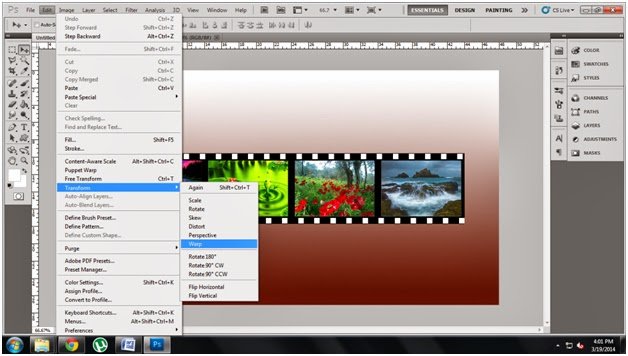
Step23: Select custom in that flag
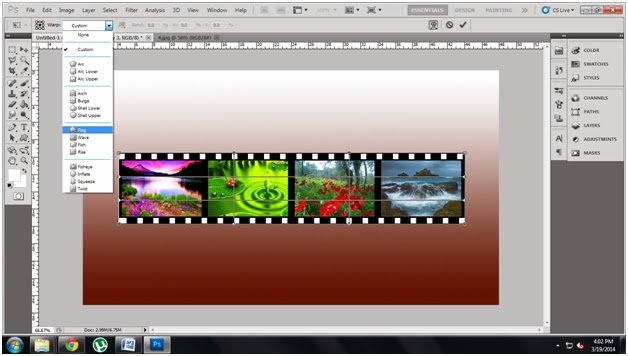
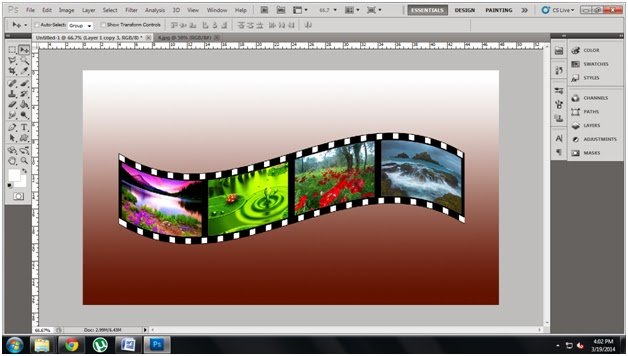
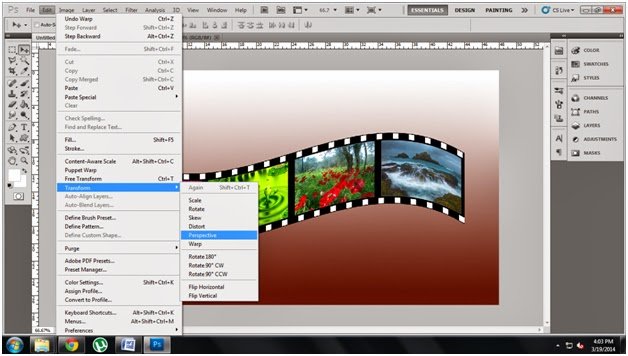
Step25: Select the Edit and transform in this perspective Adjust
the image like this by pressing right corner and drag the below
the image like this by pressing right corner and drag the below
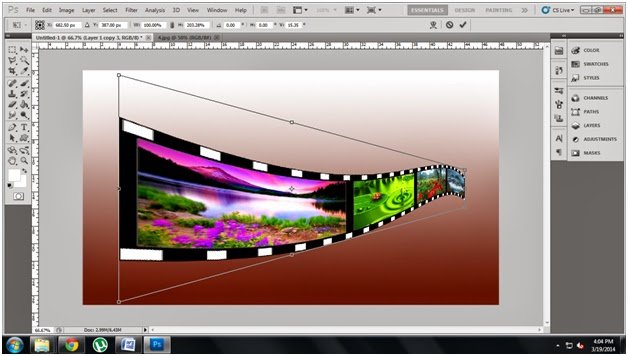
Step26: Adjust the image like this by pressing left corner
and drag the above
and drag the above
Step:27 : Go to Edit select free transform adjust the image
like this
like this
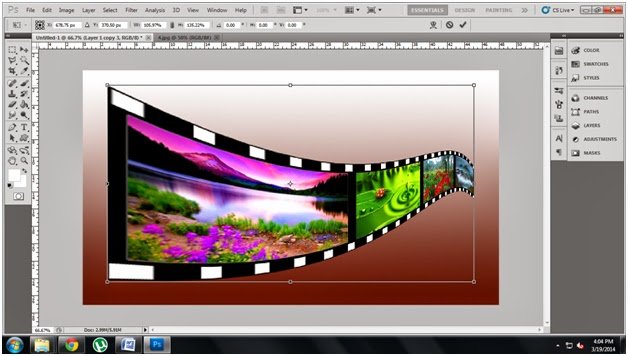
Step28 : Adjust the image like below by pressing Ctrl+T and then press enter
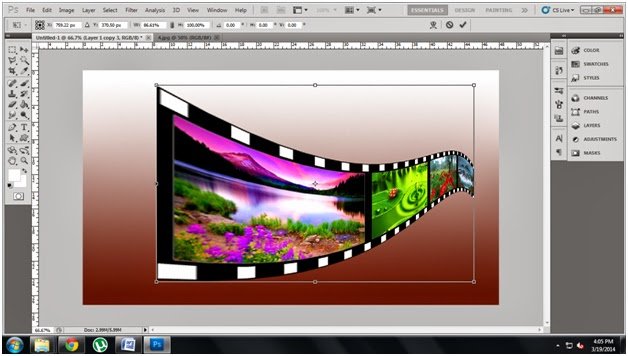
Step 29: Select brush tool select the brush like below
diagram choose the color as a black and fix the brush size like below diagram
diagram choose the color as a black and fix the brush size like below diagram
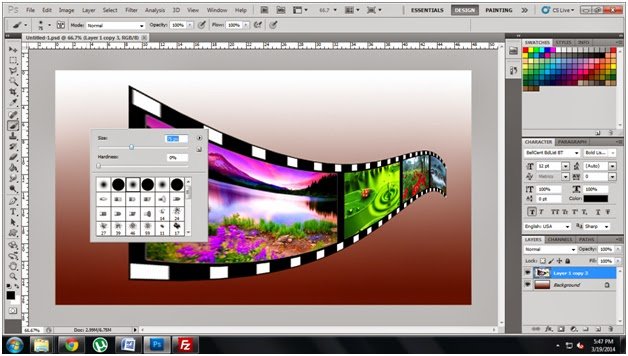
Step30: Draw the straight line by pressing shift using brush
tool
tool
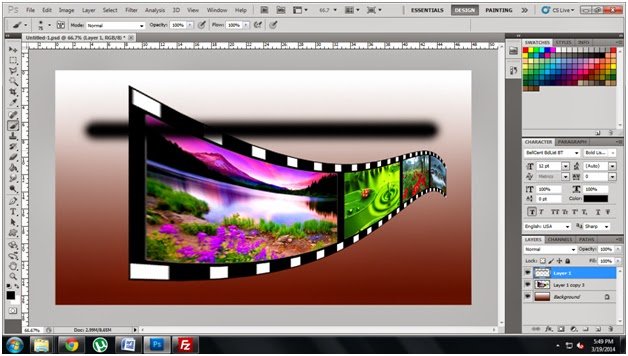
Step31: Go to Edit
Transform and Perspective adjust the image like below diagram
Transform and Perspective adjust the image like below diagram
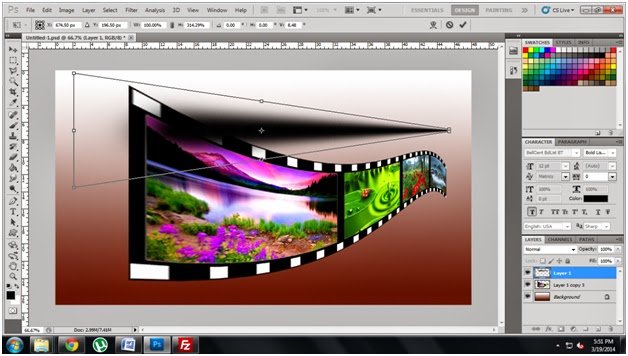
Step32: Select edit and select free transform adjust image
shadow and fix the correct place like below diagram.
shadow and fix the correct place like below diagram.
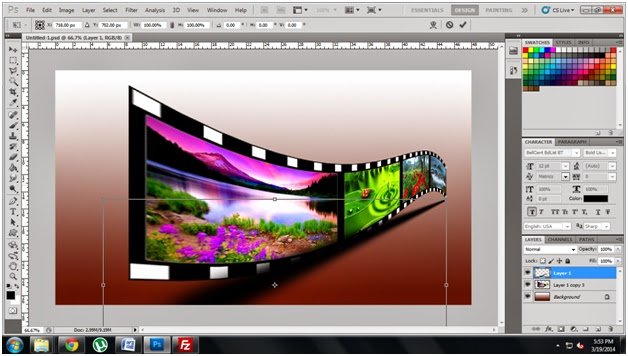
Step33: Now The project is completed you can get like below
effect…
effect…